How to Choose the Right Wall Hole Saw?
Choosing the right Wall Hole Saw is a small decision with expensive consequences. A poorly matched cutter can crack tile, overheat in masonry, or leave a rough opening around a cable route. The correct choice depends on wall material, hole diameter, cutting depth, drill power, and dust control. It is not simply a question of buying the largest available cup.
Industry data supports careful preparation. The U.S. Census Bureau reported construction spending at an annual rate of approximately $2.1 trillion in late 2023, showing the scale of renovation and building work where repetitive drilling matters. Meanwhile, OSHA’s Respirable Crystalline Silica Standard sets an action level of 25 micrograms per cubic meter and a permissible exposure limit of 50 micrograms over eight hours. That matters when a Wall Hole Saw cuts concrete, mortar, or masonry. A clean-looking hole is not enough.
This guide compares carbide-grit, diamond-grit, and bi-metal designs for common wall surfaces. It explains how arbor size, pilot-bit length, tooth geometry, and cutting depth affect control. A 68-millimeter hole saw may suit an electrical box, while a larger opening may require a different mounting method. Check the wall first. Hidden pipes and cables can change the entire plan.
Field practice also reveals a common mistake: users often force the drill when the cutter slows. That creates heat, vibration, and premature wear. Sometimes, the tool is not the problem. The selection is. Manufacturer specifications and current safety guidance should remain the final reference, because product performance varies between brands and materials.
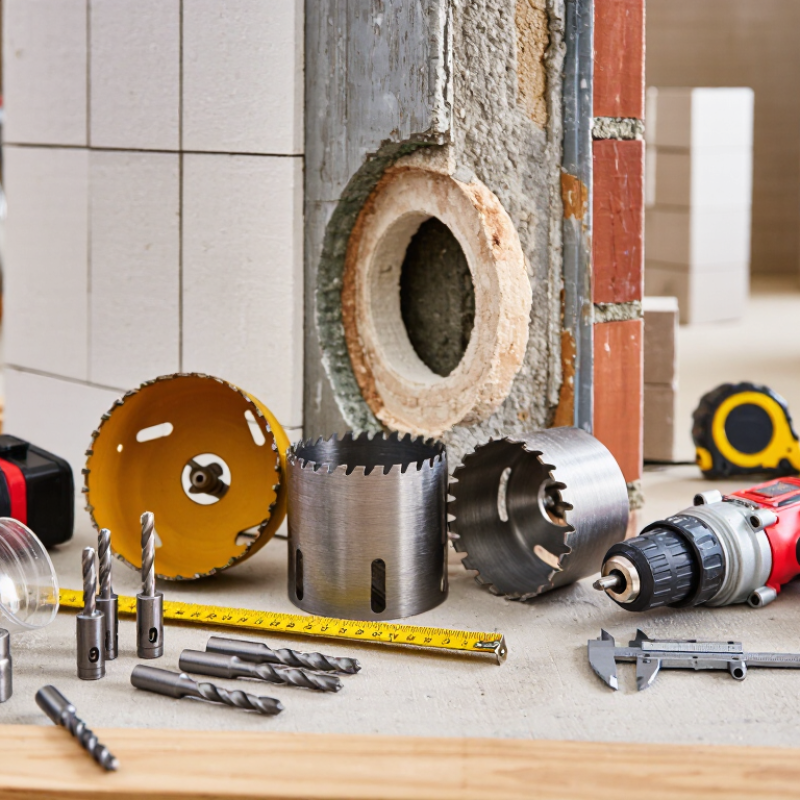
Understand the Purpose and Scope of a Wall Hole Saw
How to Choose the Right Wall Hole Saw?
Understand the Purpose and Scope of a Wall Hole Saw
Choosing the right wall hole saw starts with defining the job. Its purpose is simple: create a clean, circular opening through suitable wall materials. These openings may support cable routes, pipe access, ventilation fittings, or electrical boxes. The tool should match the wall, not merely the hole diameter. A model designed for drywall may struggle against dense board or plaster. Dust travels. So does vibration.
Check the cutting depth, tooth design, and arbor compatibility before drilling. The saw should be wide enough for the fitting, with slight clearance for adjustment. It should not be excessively large. Oversized holes weaken the surrounding surface and demand extra repair work. For masonry or concrete, use equipment specifically rated for those materials. A standard wall hole saw is not automatically suitable for them.
Inspect both sides of the wall when possible. Look for pipes, cables, studs, and hidden supports using reliable detection methods. Turn off relevant power before working near electrical routes. Wear eye protection and control dust with suitable extraction. Begin slowly, especially when the pilot bit touches the surface. A scrap-board test can reveal whether the teeth grab or wander. Measure twice. Cut once.
The scope of this tool is narrower than many beginners expect. It creates openings; it does not replace structural assessment or professional installation. Even careful planning can miss a hidden obstacle, so pause when resistance changes suddenly. That small hesitation may prevent a damaged wall, a broken fitting, or an unsafe repair.
How to Choose the Right Wall Hole Saw?
Understand the purpose and scope of a wall hole saw by matching the saw diameter and cutting method to the wall opening required.
How to read the chart: Select a hole saw diameter that matches the required opening, then choose teeth suited to the wall material. General-purpose toothed saws are commonly used for drywall and wood, while carbide-grit or masonry-rated hole saws are more appropriate for brick, block, and other abrasive materials. Always verify the required clearance, wall construction, and manufacturer specifications before cutting.
Match the Hole Saw Diameter to the Installation Requirements
How to Choose the Right Wall Hole Saw?
The correct wall hole saw diameter should follow the installation requirement, not just the visible size of the fixture. Measure the pipe, cable sleeve, junction box, or fitting that must pass through the opening. Then check the manufacturer’s required clearance. A hole that is too tight can damage insulation or make alignment difficult. A hole that is too wide may leave weak edges and require an oversized cover plate.
Wall material also affects the choice. Drywall usually needs a clean, controlled cut, while brick, tile, or concrete requires a suitable abrasive or carbide cutting edge. I usually mark the center, check for hidden wiring and plumbing, then compare the saw diameter with the actual component. Small errors matter. I once allowed too little space around a sleeve, and the final fitting became unnecessarily difficult.
Tips: Measure the opening, not the outer trim. Add only the clearance needed for movement and installation. Keep the saw level, especially on thin panels. If the required diameter falls between two sizes, stop and reassess the cover, seal, and structural edge. Bigger is not automatically safer. My measurements can still be imperfect, so I recheck them before cutting.
Check Tool Compatibility, Cutting Depth, and Safety Features
How to Choose the Right Wall Hole Saw?
Choosing a wall hole saw starts with tool compatibility. Check that the saw fits your drill, arbor, and chuck size. A powerful drill may still perform poorly with a loose connection. Match the saw material to the wall surface, such as drywall, wood, tile, or masonry. Read the tool instructions carefully. I have seen users focus on diameter but ignore the attachment system. That mistake causes wobbling, rough cuts, and damaged surfaces.
Cutting depth matters when walls contain several layers. Measure the wall material before selecting the saw. A shallow cup may stop before reaching the required opening. A deeper model can create more heat and place extra pressure on the drill. Check the maximum cutting depth, then allow room for dust and fragments. If you are unsure, test on a spare section first. It feels slower, but repairs are usually slower.
Safety features deserve close attention. Look for a stable pilot bit, secure locking parts, and controlled starting action. Use eye protection, hearing protection, and a suitable dust mask. Keep both hands positioned firmly on the drill. Before cutting, check for hidden cables, pipes, and structural supports with an appropriate detector. Turn off power where necessary, but do not assume one check is enough. Slow is safer. I sometimes recheck the cutting area after marking it, because a small measuring error can become an expensive opening. Stop immediately if the saw binds, overheats, or vibrates unusually.

